Introduction to Cannoli Bars
The irresistible allure of cannoli bars
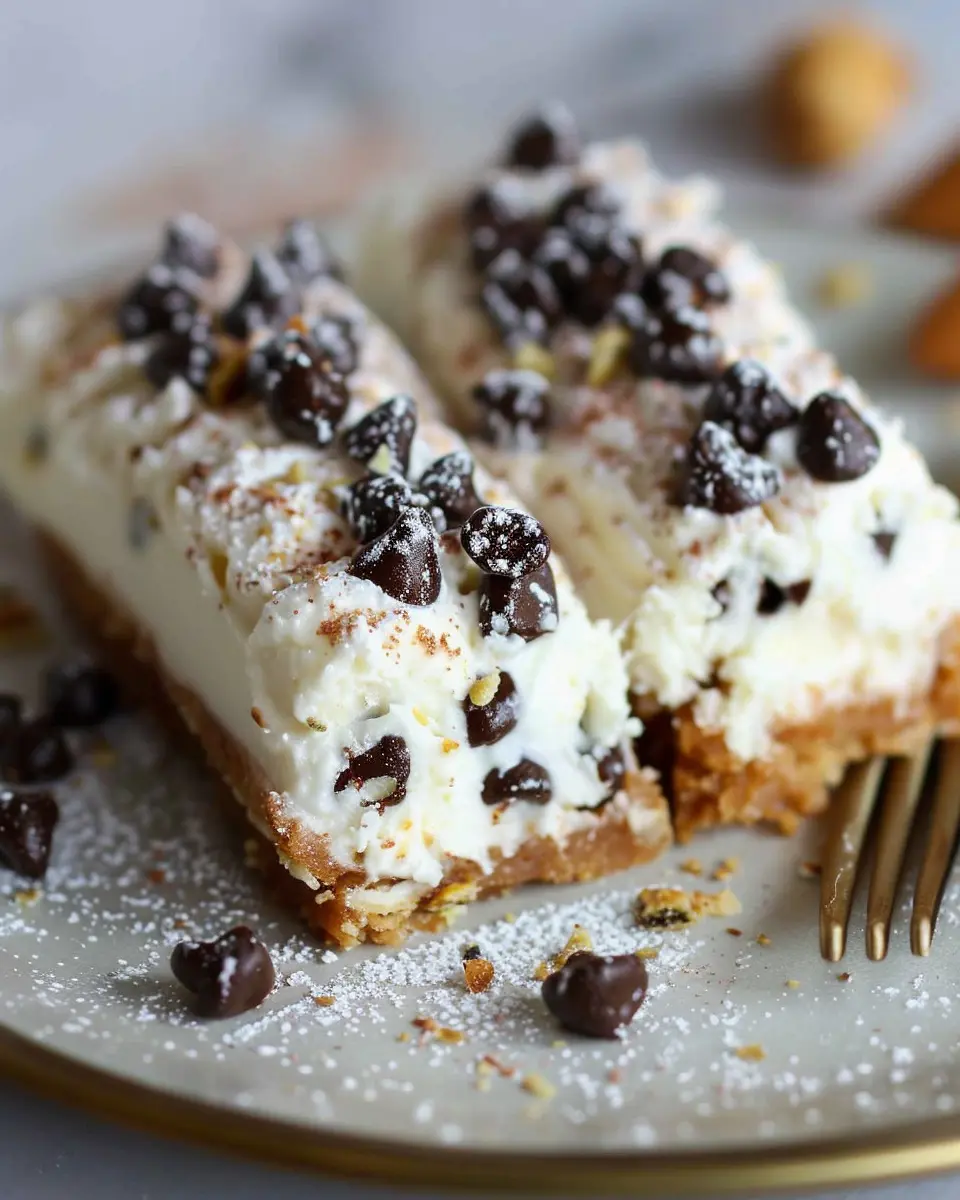
If you’ve ever experienced the delightful crunch of a cannoli shell filled with sweet ricotta, you know why these Italian pastries have captured hearts around the world. Now, imagine that beloved flavor arranged into cannoli bars—it’s a dessert that offers all the indulgence without the mess of traditional pastries. These bars feature layers of silky ricotta filling, a buttery crust, and a sprinkle of chocolate chips or candied orange for an extra kick.
What makes cannoli bars truly special is their versatility. Whether you’re hosting a gathering, bringing a dish to a potluck, or simply craving something sweet after a long week, cannoli bars deliver. Their structured form allows for easy slicing and serving, making them a perfect choice for any occasion. If you’re interested in mastering this dessert, you can check out this thorough guide on Italian desserts that breaks down the basics and techniques.
Why homemade desserts trump fast food
In today’s fast-paced world, it’s tempting to grab a quick dessert from a convenience store or a fast-food joint. However, there’s something uniquely rewarding about crafting a delicious treat at home. Homemade desserts not only allow you to tailor flavors and ingredients to your palate, but they also steer clear of the excessively high sugar and preservatives often found in pre-packaged products.
Consider this: a recent study from the Harvard School of Public Health found that homemade meals tend to be more nutritious and can help in fostering healthier eating habits. This applies to desserts too! By making your own cannoli bars, you can use fresh ingredients, control the amount of sugar, and even experiment with alternatives, like Greek yogurt for a lighter filling.
So, why not roll up your sleeves and enjoy the process? The delightful aroma of baking wafting through your kitchen and the satisfaction of creating something delicious is unparalleled. Plus, sharing a homemade dessert sparks conversation and creates lasting memories with friends and family. So, grab your mixing bowls—it’s time to dive into the world of cannoli bars!
Ingredients for Cannoli Bars
Creating delicious cannoli bars starts with the perfect blend of ingredients. Let’s dive into the essentials:
Essential Ingredients for the Crust
The crust serves as the foundation for your cannoli bars, providing a delightful crunch. Here’s what you’ll need:
- Graham cracker crumbs: These give a sweet, buttery flavor.
- Unsalted butter: Melted, to bind the crumbs together.
- Sugar: A touch of sweetness enhances the flavor.
- Cinnamon: Just a pinch adds warming spice.
You can even explore variations with different types of nuts for added texture!
Key Components for the Cannoli Cheesecake Filling
This rich filling is where the magic happens. Here’s what you shouldn’t miss:
- Ricotta cheese: The star of the show! Make sure it’s well-drained for that creamy texture.
- Cream cheese: Adds richness and a velvety mouthfeel.
- Powdered sugar: Perfect for sweetness without the graininess.
- Vanilla extract: A dash brings all the flavors together.
- Mini chocolate chips: Because who doesn’t love a little chocolate in their cannoli bars?
Feel free to experiment with ingredients from Serious Eats for some tasty twists! Happy baking!
Step-by-step Preparation of Cannoli Bars
If you’re looking to impress your friends with a delightful treat that fuses classic Italian cannoli flavors into an easy-to-make bar form, you’re in the right place! These cannoli bars are perfect for gatherings or just a cozy evening at home. Let’s dive into the delicious details of how to prepare them step-by-step.
Gather your ingredients and tools
Before you get started, it’s crucial to gather everything you’ll need to make your cannoli bars. Here’s a handy list:
Ingredients:
- 1 ½ cups Biscoff cookie crumbs
- ½ cup unsalted butter, melted
- 16 oz cream cheese, softened
- 1 cup ricotta cheese, drained
- 1 cup powdered sugar
- 1 teaspoon vanilla extract
- 1 cup mini chocolate chips
- ½ teaspoon cinnamon (optional for that extra flavor boost)
Tools:
- Mixing bowls
- Electric mixer or whisk
- Baking pan (9×9-inch recommended)
- Parchment paper
- Spatula
Having everything lined up makes the process smoother and a lot more enjoyable!
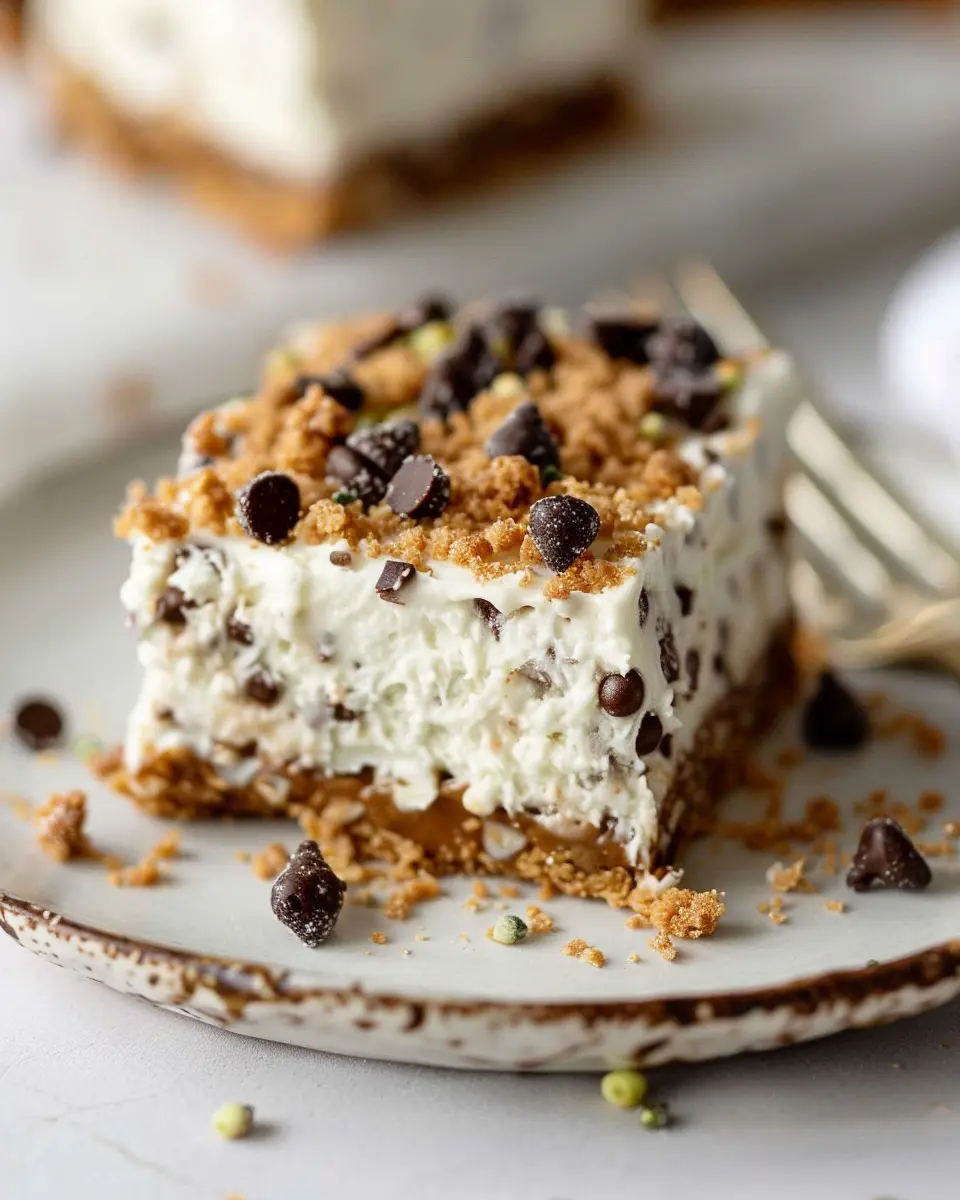
Prepare the Biscoff cookie crust
The crust is one of the stars of these cannoli bars, so let’s start strong.
- Preheat your oven to 350°F (175°C). This temp is perfect for giving your crust a little crisp.
- In a medium bowl, combine the Biscoff cookie crumbs and melted butter until well mixed. The mixture should resemble wet sand – if it’s too crumbly, just add a tad more butter.
- Press this mixture firmly into the bottom of your baking pan lined with parchment paper. This ensures easy removal later and helps keep everything tidy.
- Bake for 10 minutes, then let it cool completely while you move on to the next step.
Feeling adventurous? You could use other cookie bases if you’re not a fan of Biscoff—Oreo cookies make a delightful alternative!
Blend the cannoli cheesecake filling
Now, let’s create that creamy and dreamy filling that will bring your cannoli bars to life.
- In a large bowl, combine the softened cream cheese and ricotta cheese. Beat them together using an electric mixer (or a good old whisk) until smooth and creamy.
- Gradually add the powdered sugar and vanilla extract, mixing well until the sweet blend becomes fluffy. Don’t skip the vanilla—it’s essential for that authentic cannoli flavor!
- Gently fold in the mini chocolate chips and cinnamon (if using) with a spatula. The chocolate will add little bursts of flavor that everyone will love.
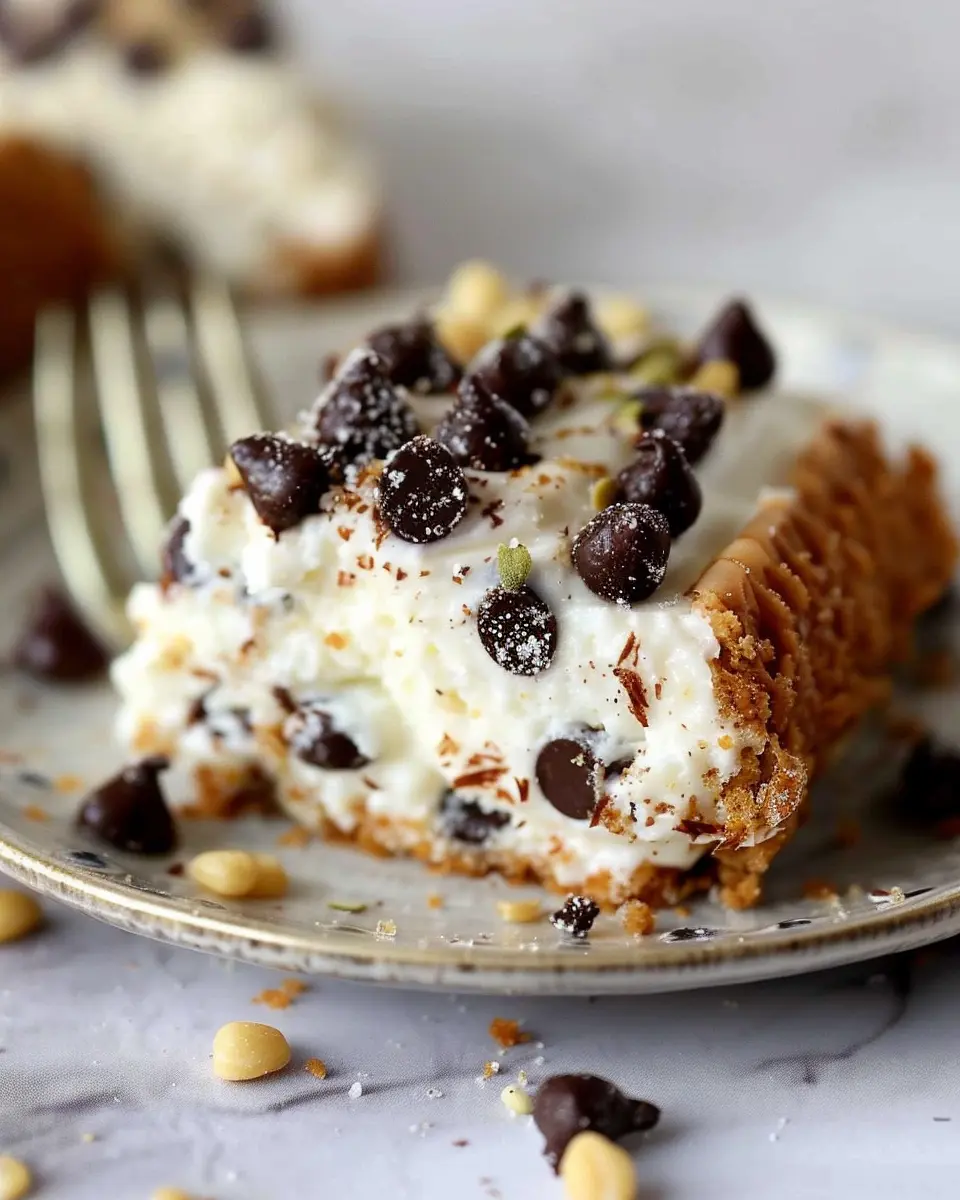
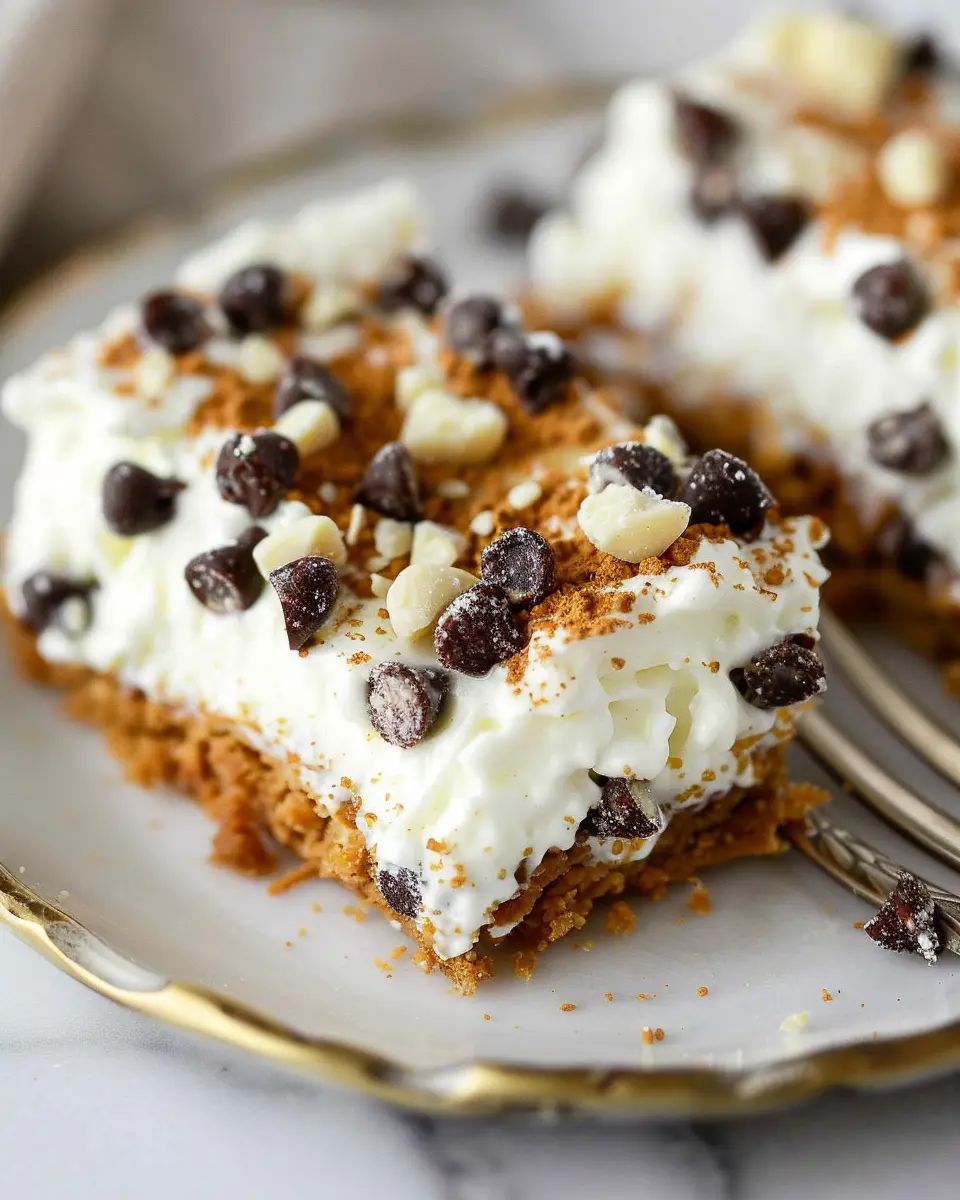
Assemble the cannoli bars
With the crust cooled and the filling ready, it’s time to bring your cannoli bars together.
- Pour the creamy filling over your cooled Biscoff cookie crust, spreading it evenly with your spatula.
- For a little extra flair, sprinkle some additional mini chocolate chips or chopped pistachios on top. It’s all about the presentation!
- Cover the baking pan with plastic wrap or aluminum foil to help the flavors meld together beautifully.
Chill and set before serving
This is where the magic happens!
- Refrigerate your assembled cannoli bars for at least 4 hours, or preferably overnight. This allows the filling to set properly and develops the flavors.
- Once chilled, use the parchment paper to lift the bars out of the pan. Cut into squares or rectangles, and you’re ready to serve!
Your homemade cannoli bars are sure to be a hit! Whether for a party or just after a long work week, these bars bring a little slice of Italy right to your dessert table. And remember, like any good recipe, feel free to innovate and adapt—who says you can’t add a cherry or a different type of chocolate? Enjoy!
Variations on Cannoli Bars
Nutty Alternatives: Using Different Toppings
When it comes to cannoli bars, the fun truly begins with toppings! Consider swapping out the classic chocolate chips for something nutty that adds a delightful crunch. Here are a few ideas to inspire you:
- Chopped Nuts: Almonds, pistachios, or hazelnuts add a lovely texture and nutty flavor. Try toasting them lightly for extra depth.
- Coconut Flakes: Unsweetened coconut flakes can provide a tropical touch. They work beautifully, especially if you’re leaning towards a more exotic flavor profile.
Toppings not only enhance the flavor but also create a stunning visual appeal. You might even experiment with drizzling caramel or chocolate sauce over the top for an indulgent finish. These variations make every batch uniquely yours!
Flavor Twists: Adding Spices and Zest
Let’s discuss how to elevate your cannoli bars with flavorful spices and zesty ingredients. A simple twist can transform your bars into a spectacular dessert that stands out.
- Cinnamon and Nutmeg: Incorporate these warm spices into your filling for a cozy vibe. They’re particularly nice in fall!
- Citrus Zest: A dash of orange or lemon zest can brighten the flavor profile. It adds a refreshing contrast to the sweetness, enhancing the overall experience.
Don’t hesitate to get creative! Have you ever thought about infusing your filling with espresso or even vanilla bean? The possibilities are endless. For even more ideas, check out this cooking guide for exciting flavor profiles that can breathe new life into your desserts.
By experimenting with toppings and flavors, your cannoli bars will always impress, no matter the occasion!
Cooking Tips and Notes for Cannoli Bars
Troubleshooting Common Issues
If you’re encountering issues while making your cannoli bars, don’t sweat it! Here are some handy tips:
- Filling Too Runny: If your filling is too liquid, consider adding more ricotta or a few tablespoons of powdered sugar to thicken it up.
- Soggy Crust: To prevent a soggy base, make sure it’s pre-baked until golden brown and let it cool completely before adding the filling. This helps maintain that delightful crunch!
Tips for Achieving the Perfect Texture
Achieving the ideal texture in your cannoli bars is essential for that delightful bite. Consider the following:
- Use Fresh Ingredients: Fresh ricotta yields a creamier filling. Check out resources on picking the best dairy here.
- Chill Before Serving: Allow your assembled bars to chill for at least an hour before serving. This lets the flavors meld and enhances that rich, creamy texture.
There you have it! With these tips, you’ll be well on your way to perfecting your cannoli bars. Enjoy baking!
Serving Suggestions for Cannoli Bars
When it comes to cannoli bars, presentation is everything! Elevate your dessert experience with these thoughtful serving suggestions.
Pairing with Fresh Fruits
To bring a refreshing twist to your cannoli bars, consider pairing them with seasonal fruits. Strawberries, blueberries, or even raspberries add a burst of flavor that perfectly complements the rich, creamy filling. Not only do fruits enhance the aesthetic appeal of your dessert platter, but they also provide a balanced taste. Plus, a sprinkle of mint leaves can kick up the freshness even more!
For a delightful touch, drizzle some melted dark chocolate over the fruit. It pairs wonderfully with the sweet and creamy nature of the cannoli bars, providing a symphony of flavors that’s hard to resist.
Fun Serving Styles for Gatherings
If you’re hosting a gathering, consider serving your cannoli bars in fun and interactive ways:
- Build-Your-Own Bar: Set up a DIY bar with various toppings—think chopped nuts, mini chocolate chips, and colorful sprinkles. This gives your guests the freedom to customize their desserts.
- Mini Portions: Cut the bars into bite-sized squares for an adorable and easy-to-eat treat.
These creative serving ideas not only enhance the experience but also make your dessert a talking point at the event! For more inspiration, check out The Kitchn for serving ideas and tips.
Time Breakdown for Cannoli Bars
Preparation time
Making your cannoli bars is a breeze! You’ll need about 15 minutes to gather your ingredients and whip up the filling. Trust me, that’s the fun part where you can let your creativity shine.
Chill time
Once you’ve assembled your masterpiece, let it chill in the fridge for at least an hour. This step is super important for achieving that perfect texture and flavor.
Total time
All told, the process takes around 1 hour and 15 minutes, but the waiting will be worth it when you take your first bite. Ready to dig in? Check out this great resource for tips on perfecting your dessert game!
Nutritional Facts for Cannoli Bars
Calories per serving
When indulging in these delightful cannoli bars, you’ll be pleased to know they’re not overly caloric. Each serving contains approximately 250 calories, making them a satisfying treat that’s easy to fit into your daily meal plan. Perfect for a mid-afternoon snack or a dessert after dinner!
Key nutritional components
These cannoli bars offer more than just sweetness; they pack a punch in nutritional content as well:
- Protein: With about 5 grams per serving, these bars help keep you feeling full.
- Carbohydrates: At around 30 grams, they provide a quick energy boost.
- Fats: Containing about 12 grams, the healthy fats come from ingredients like ricotta cheese and nuts.
- Fiber: Each serving has approximately 2 grams, aiding in digestion.
For more details on how to maintain a balanced diet while enjoying treats like these, check out the USDA’s Dietary Guidelines. Enjoy your delicious cannoli bars guilt-free!
FAQs about Cannoli Bars
Can I make cannoli bars ahead of time?
Absolutely! One of the great things about cannoli bars is that they can be prepared ahead of time without sacrificing flavor or texture. You can assemble the base and filling a day in advance and simply refrigerate them. When you’re ready to serve, just cut and garnish. If you’re looking for a time-saving tip, try this: make the filling the night before and let the flavors meld in the fridge.
What are some good substitutes for ricotta cheese?
If you find yourself in a pinch without ricotta, fear not! You have a few tasty options to choose from:
- Mascarpone: Rich and creamy, it adds a luxurious texture.
- Cream Cheese: Softened cream cheese can be a close match in terms of consistency.
- Greek Yogurt: For a healthier twist, it’s tangy and thick.
These alternatives can help create a delightful filling for your cannoli bars, while still keeping it deliciously indulgent.
How long do cannoli bars last?
Once made, your cannoli bars can last in the refrigerator for about 3-4 days. Just be sure to seal them in an airtight container to maintain their freshness. If you’re planning to enjoy them later, it’s best to keep the filling separate from the base to prevent sogginess. By doing this, you can enjoy the perfect balance of crispy and creamy every time you indulge!
For more tips on food storage, check out USDA’s Food Safety Guidelines for reliable information. Happy baking!
Conclusion on Cannoli Bars
Making cannoli bars beautifully blends creativity and tradition, offering a rewarding experience that brings joy to both the baker and the sharer. Each bite of these delicious treats encapsulates the spirit of homemade desserts, allowing you to savor moments of sweetness with friends and family.
Imagine gathering around the dining table, enjoying your delectable creation with loved ones; it’s moments like these that make life special. Whether you’re celebrating a special occasion or simply want to indulge in something delightful, these bars are sure to impress. For more details on dessert-making, check out reputable culinary sites like Serious Eats or Food Network for inspiration and tips.
PrintCannoli Bars: Easy Indulgence for Your Sweet Tooth Cravings
Indulge in these delicious cannoli bars that satisfy your sweet cravings with ease.
- Prep Time: 20 minutes
- Cook Time: 30 minutes
- Total Time: 50 minutes
- Yield: 12 bars 1x
- Category: Dessert
- Method: Baking
- Cuisine: Italian
Ingredients
- 1 cup ricotta cheese
- 1 cup mascarpone cheese
- 1 cup powdered sugar
- 1 teaspoon vanilla extract
- 1/2 cup mini chocolate chips
- 2 cups graham cracker crumbs
- 1/2 cup unsalted butter, melted
- 1/4 cup sugar
- 1 teaspoon ground cinnamon
Instructions
- Preheat your oven to 350°F (175°C).
- In a bowl, mix together the graham cracker crumbs, melted butter, sugar, and cinnamon until well combined.
- Press the mixture into the bottom of a greased baking dish to form the crust.
- In another bowl, combine the ricotta, mascarpone, powdered sugar, and vanilla extract; mix until smooth.
- Fold in the mini chocolate chips into the cheese mixture.
- Spread the cheese mixture over the crust evenly.
- Bake for 25-30 minutes until set and slightly golden.
- Let cool before slicing into bars.
Notes
- For a variation, consider adding citrus zest to the cheese mixture for a refreshing flavor.
Nutrition
- Serving Size: 1 bar
- Calories: 250
- Sugar: 12g
- Sodium: 150mg
- Fat: 12g
- Saturated Fat: 7g
- Unsaturated Fat: 4g
- Trans Fat: 0g
- Carbohydrates: 35g
- Fiber: 1g
- Protein: 3g
- Cholesterol: 40mg
Keywords: Cannoli Bars, dessert, sweet treats