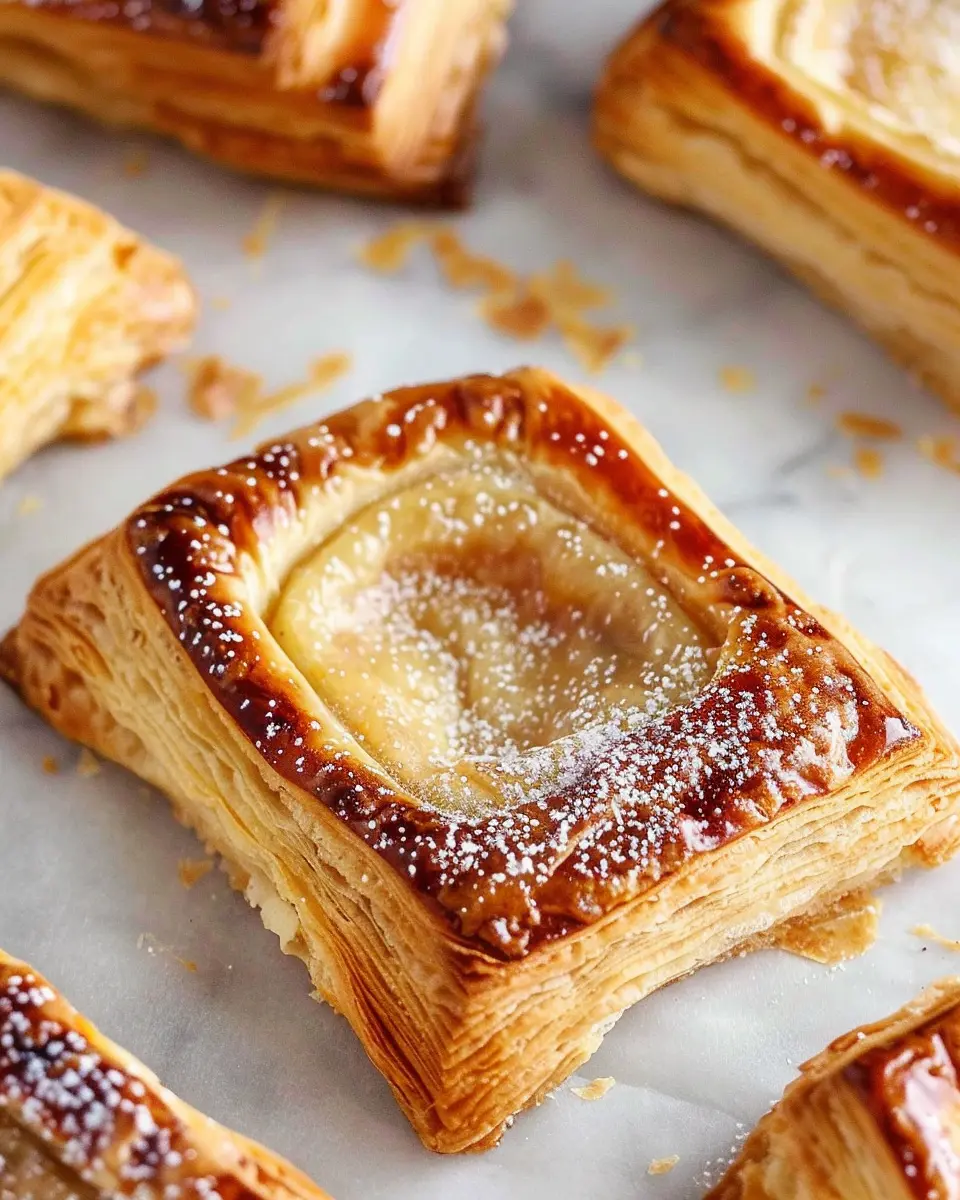
Introduction to Homemade Starbucks Cheese Danish
If you’ve ever set foot in a Starbucks, you’re likely familiar with their much-loved cheese danish. It’s that perfect balance of flaky pastry and creamy filling that makes for a delightful breakfast or snack. But have you ever thought about recreating this beloved treat right in your own kitchen? Making a homemade Starbucks cheese danish offers a multitude of benefits that go beyond just the delicious taste.
Why Bake Your Own Cheese Danish?
Baking your own cheese danish opens up a world of creativity and satisfaction. Here are some compelling reasons to give it a try:
-
Fresh Ingredients: When you make your own danish, you control the ingredients. Say goodbye to preservatives and hello to fresh, high-quality items. Why not swap out regular cream cheese for a flavored variety or add fresh fruit for an extra twist?
-
Cost-Effective: Let’s face it — frequent visits to Starbucks can add up quickly. By choosing to bake at home, you save money while indulging in a gourmet experience. You’ll find that the cost of basic baking supplies is significantly lower compared to those frequent purchases at your local café.
-
Customization: Have specific dietary needs or flavor preferences? Making a homemade Starbucks cheese danish allows you to tailor the recipe to meet your exact desires. Whether you’re vegan, gluten-free, or just craving a hint of lemon in your filling, the options are endless.
-
Impress Your Friends: There’s something almost magical about pulling a warm, homemade pastry from your oven. It’s a way to show off your culinary skills at brunch or a gathering. Everyone appreciates a tasty, homemade treat — and you’ll be the star of the show!
If you’re new to baking or just curious about perfecting your skills, check out reliable resources like the Kitchn for tips on mastering pastry dough. Becoming a home baker might be easier than you think! So, roll up your sleeves and prepare to wow your taste buds—and those of your friends—with your very own homemade Starbucks cheese danish.
Ingredients for Homemade Starbucks Cheese Danish
Essential ingredients for success
Creating a homemade Starbucks cheese danish isn’t just about following a recipe; it’s about using quality ingredients that will deliver that cafe-style experience right in your kitchen. Here’s what you’ll need:
- Puff pastry: The star of the show! Store-bought works wonders, giving you that flaky, buttery texture without the fuss.
- Cream cheese: Full-fat cream cheese gives the filling a rich, smooth consistency. You can even opt for flavored varieties to add a unique twist.
- Granulated sugar: This balances out the creaminess of the cheese with a touch of sweetness.
- Vanilla extract: A few drops enhance the overall flavor, leaving a pleasant aroma.
- Egg: An egg wash adds a beautiful golden hue to your pastry’s top—a simple step that makes a big difference.
For more tips on selecting quality ingredients, check out resources like Epicurious or Food Network.
Optional ingredients for flair
Now, while the essentials lay the foundation, don’t shy away from mixing things up a bit! Here are some optional ingredients that inject personality into your homemade Starbucks cheese danish:
- Zest: A sprinkle of lemon or orange zest can add a refreshing citrus note.
- Nutmeg or cinnamon: These spices elevate the flavor profile, giving your danish a warm, cozy feeling — perfect for enjoying with coffee.
- Fruit preserves: Adding a dollop of raspberry or apricot preserves in the center of your cheese filling can provide a delightful contrast to the creamy texture.
Using these additional ingredients can help you customize your danish to suit your taste or the season—making each batch a unique treat!
Preparing the Homemade Starbucks Cheese Danish
Creating a delicious homemade Starbucks cheese danish can be one of the most delightful projects in your kitchen. The buttery, flaky pastry paired with a creamy cheese filling makes for a perfect breakfast treat or an indulgent snack. To help you nail this recipe, we’ll break it down into manageable steps that will demystify the process and make baking feel like second nature.
Thawing the Puff Pastry
Before diving into crafting your homemade Starbucks cheese danish, the very first step is to properly thaw your puff pastry. If you’re using frozen puff pastry, it’s essential to give it enough time to defrost for optimal results. Simply remove it from the freezer and transfer it to the refrigerator for several hours, ideally overnight. If you’re in a hurry, you can leave it at room temperature for about 30 minutes instead.
Thawing it slowly allows the layers of dough to remain intact, which is key for that signature flaky texture. You can find excellent puff pastry options at any grocery store—brands like Dufour or Pepperidge Farm are great choices. Need a tip? Always check the packaging for any preparation instructions—it can make a difference in your results!
Preparing the Cream Cheese Filling
While the pastry is thawing, it’s the perfect time to whisk together your cream cheese filling. You’ll want 8 ounces of softened cream cheese for this, mixed with a bit of sugar (about 1/4 cup) and a splash of vanilla extract for flavor.
- Ingredients needed:
- 8 ounces of cream cheese, softened
- 1/4 cup granulated sugar
- 1 teaspoon vanilla extract
- Optional: a pinch of salt for balance
Using a hand mixer or a whisk, blend these ingredients until they become creamy and smooth, making sure there are no lumps. This filling is not just delicious; it’s the hallmark of a true danish. Consider adding a dash of lemon zest for a pop of freshness—just a hint goes a long way!
Assembling the Danishes
Now that you have your puff pastry thawed and your cream cheese filling prepped, it’s time to assemble your homemade Starbucks cheese danish.
- Preheat your oven to 375°F (190°C) while you work.
- Roll out the puff pastry sheet on a lightly floured surface to smooth out any creases.
- Cut the pastry into squares (about 3-4 inches) and place them on a baking sheet lined with parchment paper.
- Take a spoonful of the cream cheese filling and place it in the center of each square.
- Carefully fold the corners over the filling to create a diamond shape, pinching it at the top to secure.
Tip: Don’t worry if they don’t look perfect! Each danish has its unique character, and trust me, they’ll all taste amazing.
Applying the Egg Wash
To achieve a beautiful golden brown finish on your homemade Starbucks cheese danish, an egg wash is essential. Here’s how you make it:
- Beat one egg with a tablespoon of water (or milk for a slightly different flavor).
Using a pastry brush, gently apply the egg wash over the top of each danish. Be careful not to let it drip too much onto the baking tray, as it can burn while baking. An egg wash will not only give your pastries a lovely sheen but also help them look restaurant-quality.
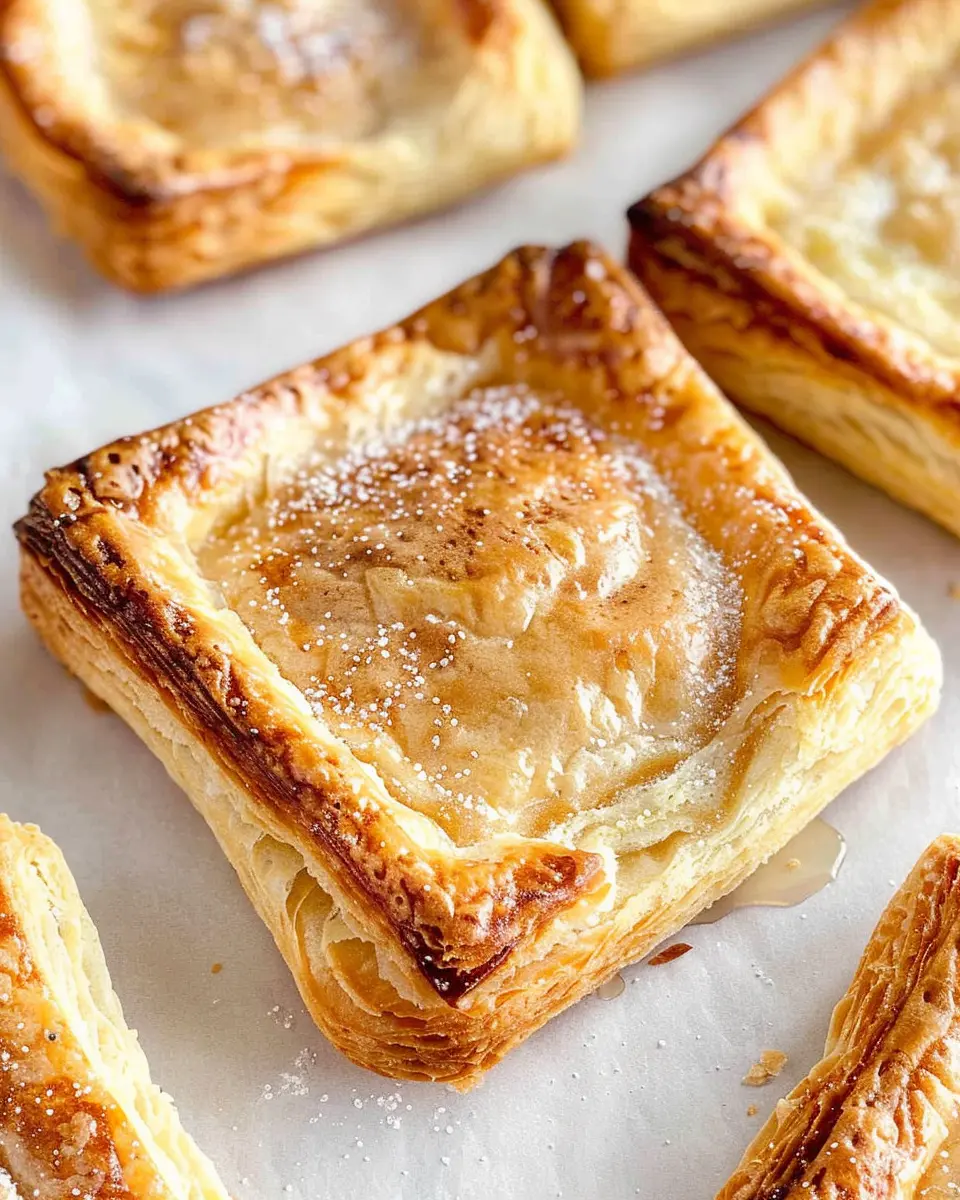
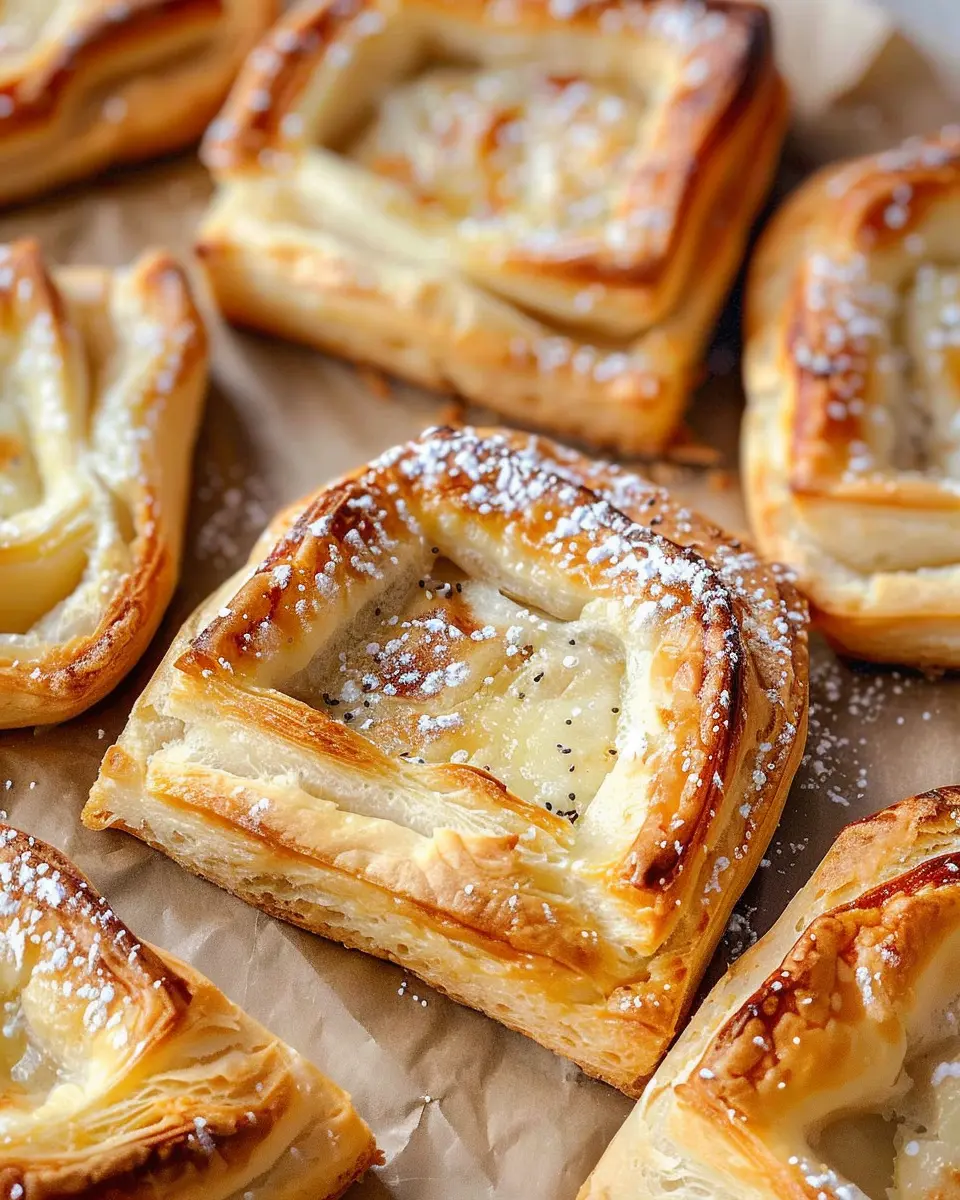
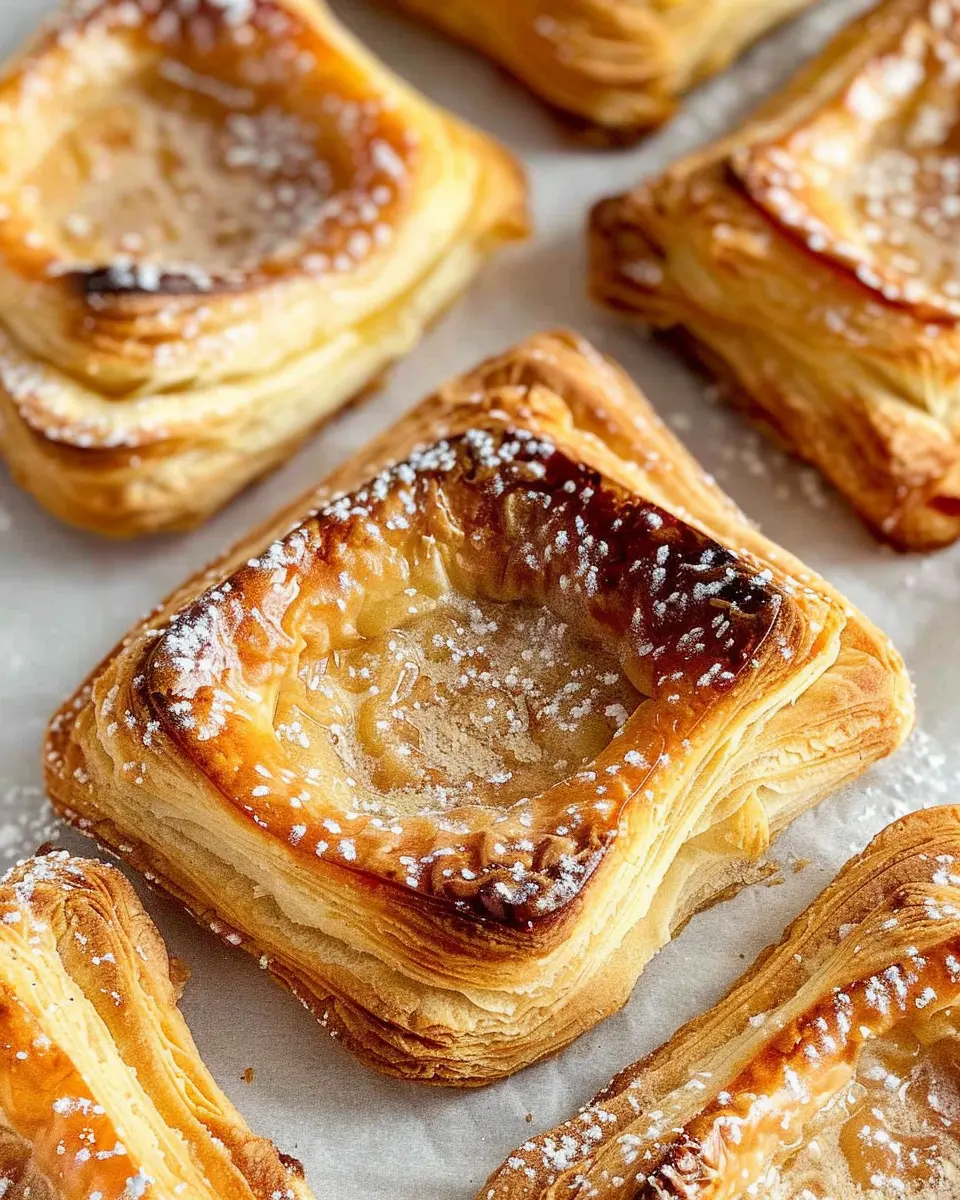
Baking to Perfection
Finally, it’s baking time! Place your assembled danishes in the preheated oven and bake for 15-20 minutes, or until they’re puffed up and golden. The aroma will be heavenly, and it might be tough to resist peeking in on them while they bake.
Once they’re done, allow them to cool for a few minutes on a wire rack. If you’re feeling indulgent, consider drizzling some icing on top made from powdered sugar and milk, just like Starbucks does!
With these straightforward steps, you can create a delightful batch of your own homemade Starbucks cheese danishes that are sure to impress your friends and family. So, are you ready to get started on this delicious journey? Your kitchen is calling!
Variations on Homemade Starbucks Cheese Danish
When it comes to creating your own homemade Starbucks cheese danish, the possibilities are endless! Each variation can bring an exciting twist to the traditional recipe, allowing you to cater to different tastes and preferences.
Fruit-Filled Cheese Danish
One of the most delightful ways to elevate your cheese danish is by adding fruit. Think about seasonal berries like blueberries, raspberries, or strawberries. Simply mix your chosen fruit with a bit of sugar and cornstarch to create a delicious filling.
- Instructions:
- Toss 1 cup of berries with 2 tablespoons of sugar and 1 tablespoon of cornstarch.
- Spoon the mixture onto your wet cheese filling before folding the dough.
You can even try using canned pie filling, like cherry or apple, for a quick fix! This fruit twist not only enhances flavor but also adds a beautiful pop of color and nutrients.
Chocolate Chip Cheese Danish
For the chocolate lovers among us, why not try a chocolate chip version of your homemade Starbucks cheese danish? It incorporates sweet chunks of chocolate, creating a gooey center that’s just irresistible.
- Instructions:
- Fold in ½ cup of mini chocolate chips into your cheese mixture before assembling your danishes.
- Drizzle melted chocolate on top after baking for an extra indulgence.
Pairing these chocolate-filled delights with a cup of coffee can totally elevate your breakfast or snack game!
Consider experimenting with cinnamon or nutmeg as well for added warmth and depth. You’ll impress friends and family alike with these variations, and who knows—you might even create your new favorite snack! If you’re looking for more inspiration, check out this fruit pairing guide for the best choices to use.
Cooking notes for Homemade Starbucks Cheese Danish
Tips for Handling Puff Pastry
Working with puff pastry can be a bit tricky if you’re not familiar. Here are some handy tips:
- Keep it cold: Puff pastry relies on cold temperatures to puff up beautifully. If it starts to warm up, pop it back in the fridge for a few minutes.
- Roll gently: When rolling out your pastry, use light pressure to avoid flattening the layers that create that delightful flakiness.
- Use flour sparingly: Too much flour can make the pastry tough, so dust your surface lightly before rolling.
Importance of Room Temperature Ingredients
For your homemade Starbucks cheese danish to reach its full potential, make sure that your cream cheese and egg are at room temperature. This allows for:
- Smooth mixing: Cold cream cheese can be difficult to blend, leading to lumps in your filling.
- Better rise: Room temperature ingredients help the dough expand evenly, resulting in that perfect puff.
To elevate your cheese danish experience, consider adding a splash of vanilla extract or a hint of lemon zest to the filling. This will not only enhance the flavor but will also impress your taste buds! If you’re interested in more tips on baking, check out the King Arthur Baking Company for expert guidance.
Serving suggestions for Homemade Starbucks Cheese Danish
Pairing with coffee or tea
When it comes to enjoying your homemade Starbucks cheese danish, the right beverage can elevate the experience to new heights. Imagine pairing this delightful pastry with a rich and velvety cappuccino—its creamy texture perfectly complements the sweet and tangy filling of the danish. If you prefer tea, a fragrant Earl Grey or chamomile provides a soothing backdrop, bringing out the subtle flavors of cream cheese and buttery dough.
For an extra treat, consider making a sweet vanilla latte or matcha tea to accompany your danish. Both choices offer a unique flavor profile, ensuring every bite is satisfying. Have you ever tried a spiced chai with your cheese danish? If not, you’re in for a delightful surprise!
Creative serving ideas
Serving your homemade Starbucks cheese danish can be a fun and inventive experience. Try these ideas to make your presentation stand out:
- Fruit Toppings: Add a sprinkle of fresh berries or a slice of peach for a burst of color and flavor.
- Drizzled Glaze: A simple icing made from powdered sugar and a splash of milk can transform your danish into a stunning centerpiece.
- Side Dishes: Pair with Greek yogurt or a fruit salad for a breakfast that’s not only delicious but also wholesome.
Get inspired by various serving styles to find what you love best. Remember, it’s all about creating memorable moments with each serving! Want more ideas? Check out this article on enhancing pastry presentations.
Time breakdown for Homemade Starbucks Cheese Danish
Preparation Time
Making your own homemade Starbucks cheese danish is a delightful adventure that starts with about 30 minutes of preparation. During this time, you’ll mix the cream cheese filling, roll out the dough, and shape each danish. A bit of patience here will pay off with delicious results.
Baking Time
You’ll want to set aside around 20-25 minutes for baking. You’ll know they’re ready when they’re golden brown and the delightful aroma fills your kitchen, inviting everyone to join in the fun.
Total Time
All in all, you’re looking at about an hour to enjoy freshly baked homemade Starbucks cheese danish. It’s well worth the effort! Plus, it’s a great way to impress friends or enjoy a special treat during your work-from-home coffee break. For tips on dough techniques, check out King Arthur Baking for a wealth of resources!
Nutritional facts for Homemade Starbucks Cheese Danish
When it comes to indulging in a delicious homemade Starbucks cheese Danish, knowing the nutritional breakdown can help you enjoy every bite guilt-free. Let’s dive into the details!
Calories
A typical serving of your homemade Starbucks cheese Danish comes in at around 320 calories. This makes it a lovely treat for those afternoons when you need a boost but still want to keep things balanced.
Macros Breakdown
Let’s break down the macros for a better understanding:
- Carbohydrates: Approximately 38 grams
- Protein: Around 8 grams
- Fat: About 15 grams
Each bite is a delightful mix of textures and flavors! You can make this treat even healthier by using whole-wheat pastry flour or opting for low-fat cream cheese. This easy-to-make recipe allows for flexibility, so you can customize it to fit your dietary needs.
If you’re interested in more information about dietary choices, the USDA has fantastic resources on nutrition that can guide you through healthy eating.
FAQs about Homemade Starbucks Cheese Danish
Can I freeze these danishes?
Absolutely! Freezing your homemade Starbucks cheese danishes is a great way to enjoy them later. Simply bake them, allow them to cool completely, and then wrap each one tightly in plastic wrap or aluminum foil. Place them in an airtight container or freezer bag, and they can last for about 2-3 months. When you crave a warm, cheesy delight, just pop one in the oven directly from the freezer at 350°F for about 15-20 minutes.
What are some common mistakes to avoid?
Making homemade Starbucks cheese danishes can be a breeze, but a few pitfalls can derail your deliciousness:
- Overworking the dough: Be gentle! Too much handling can lead to tough pastries.
- Skipping the chilling time: Chilling the dough helps achieve the right flakiness, so don’t rush this step.
- Not sealing the filling: Make sure the cheese filling is sealed well inside the dough to prevent leaks during baking.
To dive deeper into helpful baking techniques, you might find this article from King Arthur Flour beneficial.
How can I make them healthier?
If you’re looking to lighten up your homemade Starbucks cheese danish, consider these tweaks:
- Use low-fat cream cheese: This reduces the caloric intake while maintaining creaminess.
- Swap sugar for natural sweeteners: Try using honey or maple syrup for a healthier sweetening option.
- Incorporate whole grain flour: Replacing regular flour with whole grain can boost fiber content without sacrificing texture.
With these adjustments, you can enjoy guilt-free indulgence!
Conclusion on Homemade Starbucks Cheese Danish
Final thoughts on your baking journey
Baking your own homemade Starbucks Cheese Danish is more than simply following a recipe—it’s a delightful opportunity to explore your culinary creativity. Each bite brings the comforting flavors of the coffee shop right into your kitchen. Remember, practice makes perfect; your first attempt may not look Instagram-ready, but that’s part of the joy!
Don’t shy away from experimenting with fillings or toppings. Consider adding fresh fruit or a sprinkle of cinnamon for a fun twist. If you enjoyed this recipe, check out others on Cooking Light or Serious Eats for more ideas. Happy baking!
PrintHomemade Starbucks Cheese Danish: Easy Recipe You’ll Love

A delicious homemade version of the popular Starbucks Cheese Danish.
- Prep Time: 20 minutes
- Cook Time: 20 minutes
- Total Time: 40 minutes
- Yield: 8 servings 1x
- Category: Dessert
- Method: Baking
- Cuisine: American
- Diet: Vegetarian
Ingredients
- 1 package cream cheese
- 2 tablespoons sugar
- 1 teaspoon vanilla extract
- 1 package puff pastry sheets
- 1 egg (beaten)
Instructions
- Preheat the oven to 400°F.
- In a bowl, mix cream cheese, sugar, and vanilla extract until smooth.
- Roll out puff pastry and cut into squares.
- Place a spoonful of cream cheese mixture in the center of each square.
- Fold the corners over the filling and brush with beaten egg.
- Bake for 15-20 minutes until golden brown.
Notes
- You can add fruits like berries for extra flavor.
- For a richer taste, add lemon zest to the filling.
Nutrition
- Serving Size: 1 danish
- Calories: 250
- Sugar: 5g
- Sodium: 150mg
- Fat: 15g
- Saturated Fat: 8g
- Unsaturated Fat: 7g
- Trans Fat: 0g
- Carbohydrates: 30g
- Fiber: 1g
- Protein: 4g
- Cholesterol: 30mg
Keywords: Homemade Starbucks Cheese Danish, cheese danish recipe, easy danish pastry