Introduction to Cookie Butter Icebox Cake
If you’re on the lookout for a delightful dessert that’s as easy to make as it is to devour, look no further than cookie butter icebox cake. This lavish treat combines layers of luscious cookie butter with rich cream and cookies, all coming together to create a mouthwatering experience that will leave you and your guests coming back for seconds.
Why Cookie Butter Icebox Cake is a Must-Try Dessert
Imagine a dessert that requires minimal effort but feels luxurious on your taste buds—that’s the beauty of a cookie butter icebox cake. This dessert is an absolute crowd-pleaser, rich in flavor yet light enough for any occasion. Perfect for gatherings or cozy nights in, it’s the kind of recipe that makes you feel like a culinary star without the time commitment that usually comes with elaborate desserts.
The star of the show here is cookie butter, a spread made from crushed biscuits and spices, which adds an irresistible depth of flavor. If you haven’t tried it yet, you’re missing out! According to a popular article from Bon Appétit, cookie butter’s creamy, caramel-like taste can elevate even the simplest of desserts. Incorporating this savory ingredient into your cake is not just trendy; it’s a game-changer.
What’s more, this cake doesn’t require any baking, making it super convenient for busy young professionals. You can layer the ingredients, chill it for a few hours (or overnight), and voila! You have a stunning cake ready to impress. It’s a fantastic option for those who might feel intimidated by traditional baking or simply don’t have the time.
The texture is another reason to try this cake. With soft, creamy layers complementing each crunchy cookie bite, every mouthful is a balanced experience of indulgence. Plus, it’s so versatile! Change up the cookies or toppings to suit your style or the season.
So, why not give it a whirl? This cookie butter icebox cake could become your new go-to dessert for any occasion. Stay tuned for the recipe that will unlock this easy yet sophisticated cake in your kitchen!

Ingredients for Cookie Butter Icebox Cake
Essential ingredients for the perfect treat
When it comes to creating a scrumptious cookie butter icebox cake, having the right ingredients is essential. Here’s what you’ll need to whip up this delightful dessert:
-
Cookie Butter: The star of the show! Look for a creamy, high-quality cookie butter to ensure rich flavor. Brands like Biscoff and Trader Joe’s are popular choices!
-
Heavy Whipping Cream: For that luscious whipped cream layer that adds a light, airy texture, opt for heavy whipping cream. It whips up beautifully and holds its shape well.
-
Graham Crackers: A classic base for icebox cakes, graham crackers provide a slightly sweet crunch. Feel free to use the cinnamon variety for an extra flavor boost.
-
Powdered Sugar: This is your secret ingredient for sweetening the whipped cream without the grittiness of granulated sugar.
-
Vanilla Extract: Just a splash adds depth and enhances the flavors of both the whipped cream and the cookie butter.
Each element plays a critical part in achieving that irresistible taste you crave in a cookie butter icebox cake. With these ingredients on hand, you’re well on your way to impressing your friends at any gathering. For tips on picking the best cookie butter, check out The Kitchn’s guide for expert insights!
Preparing the Cookie Butter Icebox Cake
Creating a delicious cookie butter icebox cake is not just about gathering ingredients; it’s an experience filled with sweetness and anticipation. This no-bake dessert is perfect for young professionals who want to impress friends or indulge in a delightful treat without spending hours in the kitchen. Let’s break down each step for a smooth sailing journey into cake heaven!
Gather Your Ingredients
Before you dive into the preparation, it’s essential to gather everything you’ll need. Here’s a list of what you will require:
- 1 cup of heavy whipping cream
- 1 cup of cookie butter (smooth or crunchy)
- 1 cup of mascarpone cheese
- 1 teaspoon of vanilla extract
- 1 pack of graham crackers (or your favorite cookies)
- Optional toppings: crushed cookies, chocolate shavings, or caramel drizzle
Having everything laid out will make your baking experience much smoother. Plus, make sure to grab some bowls and spatulas; they are essential for mixing!
Whip the Heavy Cream
Now we get to the fun part! In a mixing bowl, pour in the heavy cream and turn on your mixer. Whip it until soft peaks form. This part is crucial as it adds air to your mixture, creating a light and fluffy texture in your cookie butter icebox cake.
Fun tip: If you want to ensure your whipped cream holds its shape, consider chilling your mixing bowl beforehand. A little bit of extra preparation can make a considerable difference in the outcome.
Combine the Cookie Butter and Mascarpone
Once your heavy cream is whipped to perfection, it’s time to blend together the cookie butter and mascarpone cheese. In a separate bowl, add the cookie butter, mascarpone, and vanilla extract. Mix until smooth and creamy.
You’ll know you’re on the right track when the mixture becomes a dream-like consistency—seriously, this stuff is irresistible! The sweet and spiced flavor of the cookie butter paired with the creamy mascarpone is what makes this cake a hit.
If you want to learn more about these versatile ingredients, check out this article on the wonderful world of cookie butter.
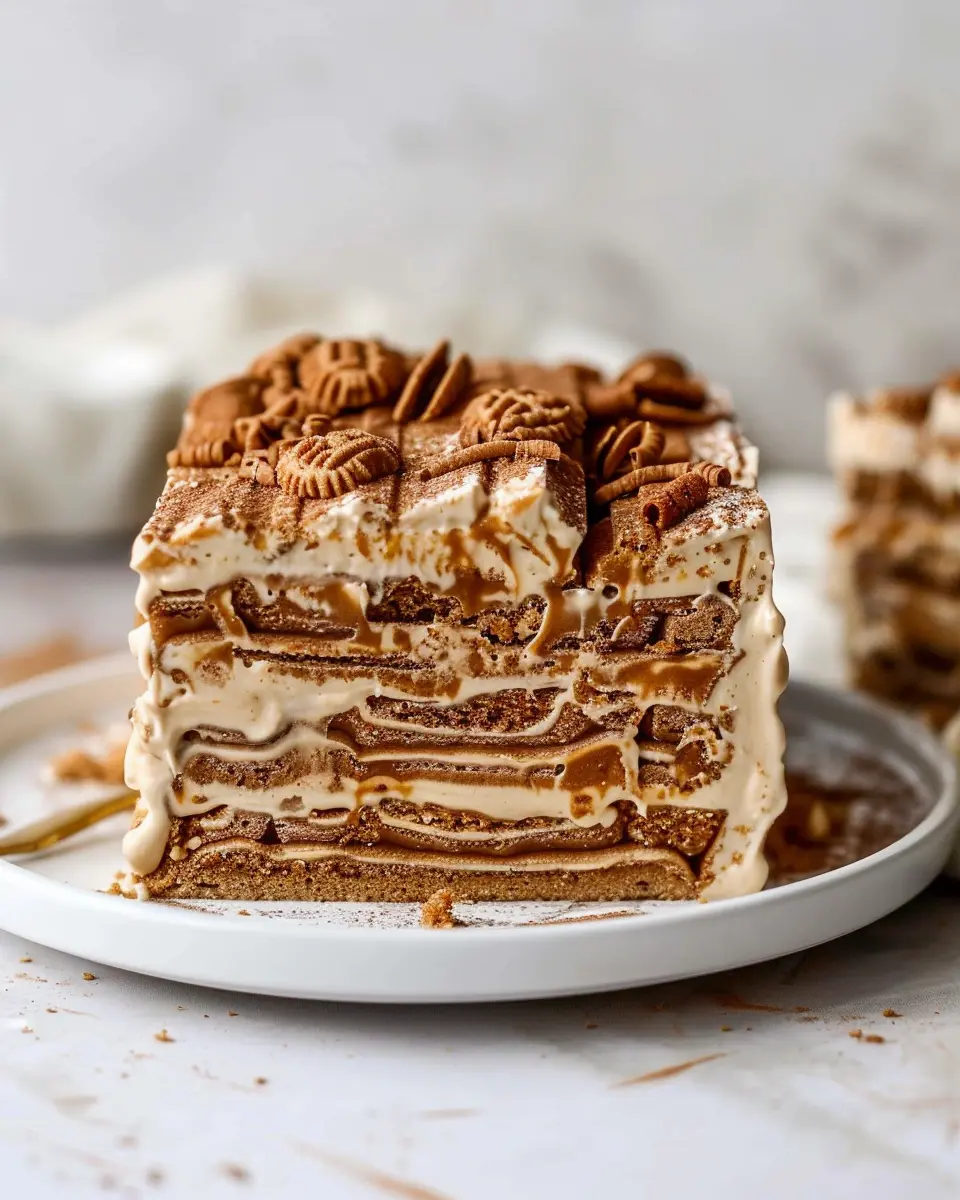
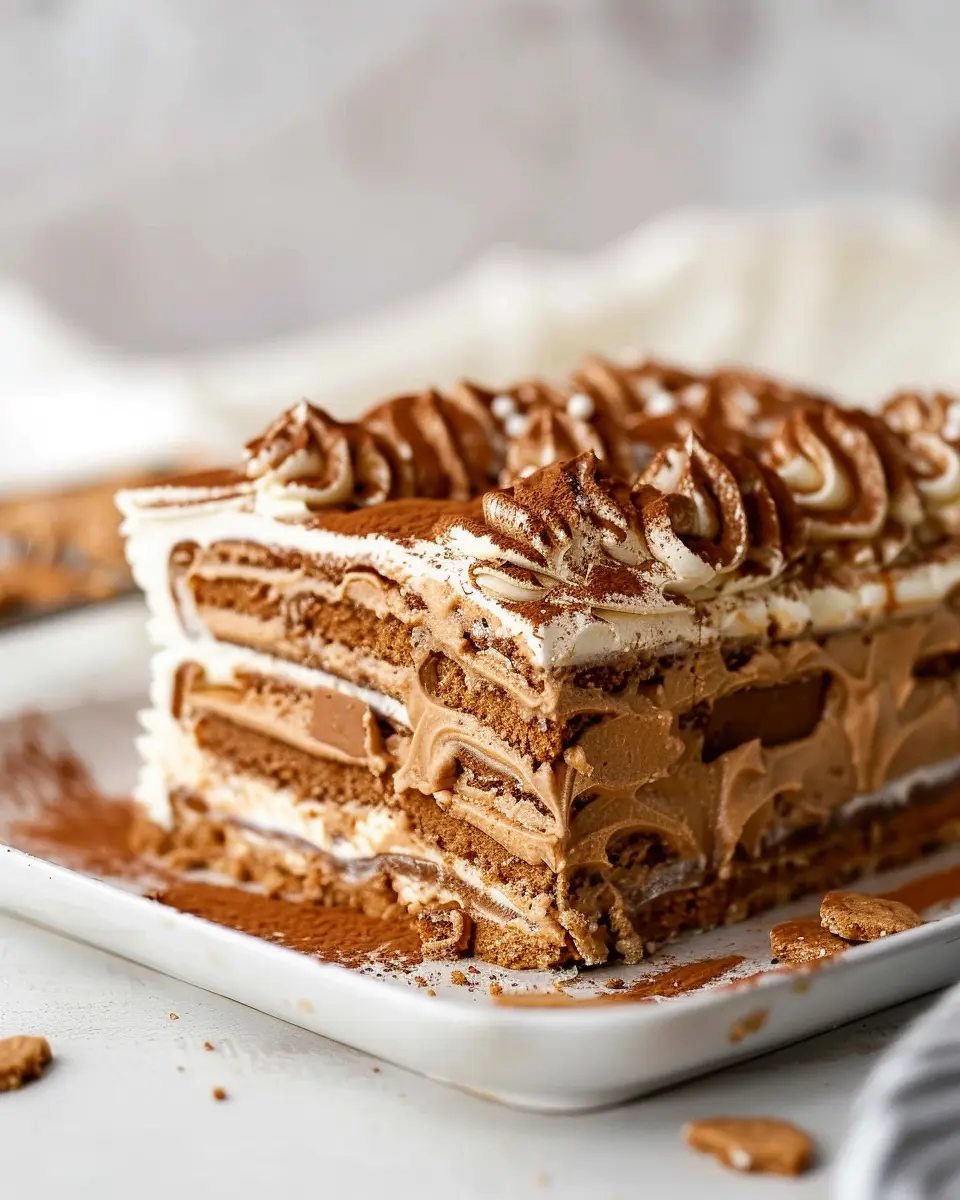
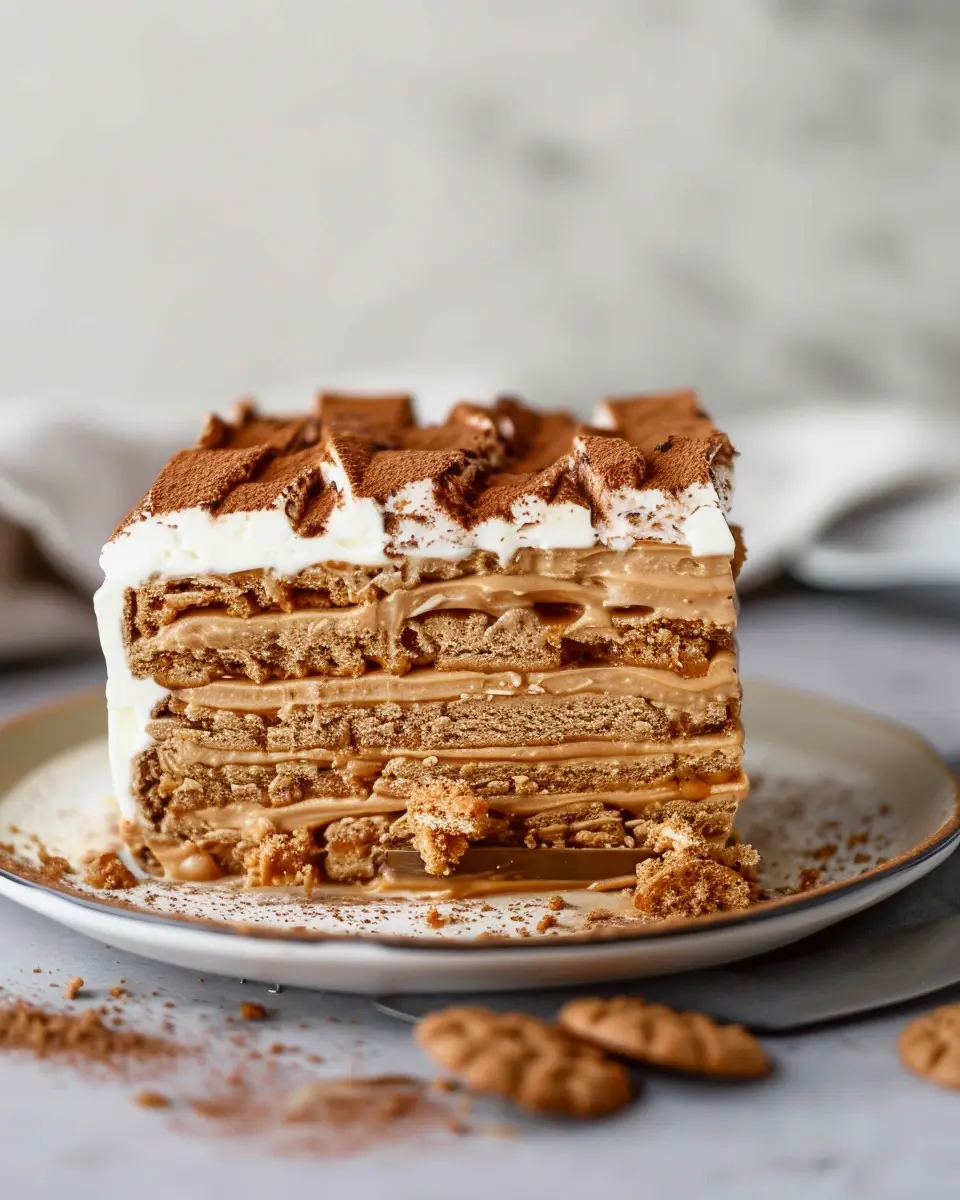
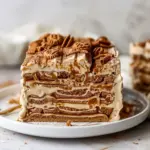
Assemble the Cake Layers
Assembling your cookie butter icebox cake is where the magic happens! Start by laying out a layer of graham crackers (or your favorite cookies) at the bottom of a rectangular or square dish.
Next, spread a generous layer of your cookie butter-mascarpone mixture over the crackers. Repeat this process—cookie layer, cream layer—until you reach the top of your dish. Finish with a final layer of the cookie butter mixture. For an added touch of flair, sprinkle some crushed cookies or chocolate shavings on top before covering the whole dish with plastic wrap.
Now, this is where you can really get creative and think about how you want to present your finished product.
Refrigerate and Let the Magic Happen
The final step is one of the most important: refrigeration. Place your assembled cookie butter icebox cake in the fridge for at least 4 to 6 hours, or ideally overnight. This “chill time” allows the flavors to meld beautifully and gives the cake a solid structure, making it easier to slice when you’re ready to serve.
While you wait, you could whip up some herbal tea or coffee to accompany your dessert later. Imagine your guests’ faces when you present this chilled delight after a nice meal!
In conclusion, preparing a cookie butter icebox cake is an easy yet impressive dessert that combines the unique flavor of cookie butter with delightful textures. So, grab those ingredients and get started on a cake that will undoubtedly leave your taste buds dancing.
Variations on Cookie Butter Icebox Cake
Chocolate Cookie Butter Icebox Cake
If you’re a fan of that rich, velvety flavor of chocolate, why not elevate your cookie butter icebox cake by adding some cocoa magic? Simply substitute half of your cookies with chocolate wafers or even crushed chocolate biscotti for a decadently indulgent twist. Layer them with your cookie butter mix, and you’ve created a dessert that’s hard to resist. You could also mix in some chocolate chips into your cookie butter cream, allowing every bite to explode with sweetness.
Seasonal Fruit Additions for a Twist
Adding fresh fruits is an exciting way to put your own spin on a classic cookie butter icebox cake. For a summery vibe, consider layering in sliced strawberries, blueberries, or even peaches. The natural sweetness of the fruit harmonizes beautifully with the rich flavors of the cookie butter, providing a refreshing contrast. When fall rolls around, think about incorporating spiced apples or pears for a seasonal touch.
Whichever variation you opt for, don’t shy away from experimenting. You can learn more about customizing desserts from resources like Food52. Who knows? You might stumble upon a delightful combination that becomes a family favorite. Don’t hesitate to share your innovative ideas and tricks in the kitchen—the best part about cooking is making it your own!
Cooking tips and notes for Cookie Butter Icebox Cake
Tips for achieving the best texture
To ensure your cookie butter icebox cake has that perfect balance of creaminess and crunch, consider these helpful tips:
- Layering is key: Start with a layer of cookie butter and then alternate with layers of cookies and whipped topping. This helps create a delightful depth of texture.
- Let it chill: Give your cake plenty of time in the refrigerator. Aim for at least four hours, but overnight is even better! This allows the cookies to soften just enough and absorb those delicious flavors.
- Whip it right: When making your whipped cream, be sure to whip it to stiff peaks. This will provide stability and keep your cake from becoming too soggy.
How to properly store your cake
Proper storage is crucial for keeping your cookie butter icebox cake fresh. Here’s how:
- Cover tightly: Use plastic wrap or an airtight container to keep out air and moisture. This protects the texture and flavor.
- Refrigerate: Always store your cake in the fridge to maintain its chilled state and creamy texture. It can last up to five days, but honestly, it’s so good, it’ll likely disappear much faster!
For more tips on cake storage, check out resources from The Spruce Eats. Enjoy your baking adventure, and unleash your inner pastry chef!
Serving Suggestions for Cookie Butter Icebox Cake
Creative Serving Ideas to Wow Your Guests
When it comes to serving your cookie butter icebox cake, presentation is key! This delightful dessert not only tastes divine but also offers plenty of room for creativity. Here are some fun ways to make your cake the centerpiece of any gathering:
-
Individual Servings: For a modern twist, serve the cake in small glass jars or cups. Layer the cake with whipped cream and a sprinkle of cookie crumbs on top. This personal touch makes it easy for guests to enjoy without the mess!
-
Toppings Galore: Elevate your cookie butter icebox cake with toppings like fresh fruits. Slices of bananas, strawberries, or a drizzle of chocolate ganache can take the flavor to another level.
-
Garnish Like a Pro: Finish the presentation with a dusting of powdered sugar or crushed cookies for added texture. It not only looks appealing but adds to that cookie crunch you love.
-
Themed Events: Match the cookie butter theme with coffee or chai lattes for a cozy, indulgent brunch or dessert party.
Experiment with these ideas, and you’ll surely impress your guests! For more inspiration, check out this guide on dessert plating techniques.
Time breakdown for Cookie Butter Icebox Cake
Preparation time
Making your cookie butter icebox cake is a breeze! You’ll need about 20 minutes to whip up the ingredients and layer everything together. Just make sure you have all your goodies, like cream cheese, whipped cream, and of course, delicious cookie butter.
Inactive chilling time
Once you’ve put the cake together, it’s time for the magic to happen. You’ll need to let it chill for at least 4 hours. This is when all those flavors meld beautifully, creating a cake that’s as irresistible as it is easy to make.
Total time
In total, you’ll set aside about 4 hours and 20 minutes to enjoy your delicious creation! While it does require some patience, trust me, the wait is worth every bite. For some additional tips on making icebox cakes, check out websites like King Arthur Baking or Serious Eats for insights that can elevate your dessert game. Happy baking!
Nutritional facts for Cookie Butter Icebox Cake
When indulging in a cookie butter icebox cake, keeping an eye on nutrients can help you balance enjoyment with health. Here’s a quick look at its nutritional profile:
Calories
One serving typically contains around 250-300 calories. This makes it a decadent treat but still manageable within a balanced diet.
Carbohydrates
With approximately 35-40 grams of carbohydrates per slice, this dessert is rich in sweet satisfaction. Consider this if you are monitoring your carb intake.
Fats
Expect about 14-18 grams of fats in each serving, primarily from the cream and cookie butter. While some might label this as indulgent, healthy fats can play a role in a well-rounded diet when enjoyed in moderation.
For those curious about ingredient sourcing, you might want to check out Healthline’s insights on fats for a deeper understanding of their role in your daily diet. Balancing your meals with nutrient-dense options surrounding this dessert can enhance your overall dietary strategy!
FAQs about Cookie Butter Icebox Cake
Can I make this cake in advance?
Absolutely! The cookie butter icebox cake is actually best when made ahead of time. By allowing the layers to chill in the fridge for a few hours—or even overnight—you give the flavors ample time to blend, making it even more delicious. Just cover it tightly with plastic wrap to keep it fresh, and you’ll have a show-stopping dessert waiting for you whenever you need it!
What are some ingredient substitutes?
If you’re in need of substitutes, you’re in luck! Here are some ideas to help you get creative:
- Cookie Butter: If you can’t find cookie butter, try using almond butter or peanut butter for a different flavor profile.
- Whipped Topping: You can use homemade whipped cream or Greek yogurt for a healthier twist.
- Vanilla Wafers: Graham crackers or digestive biscuits can work just as well.
For more inspiration, check out this guide on ingredient substitutions to keep your baking on track!
How do I store leftovers?
If you happen to have leftovers (which might be a challenge after serving this delightful cake!), be sure to store them properly. Keep your cookie butter icebox cake covered in the refrigerator; it should last about 3-4 days. Just remember to bring it out a little before serving so the texture can soften up for that perfect slice!
With these FAQs, you’ll be well-prepared to whip up your cookie butter icebox cake and impress your friends and family. Happy baking!
Conclusion on Cookie Butter Icebox Cake
Why you should try making this cake at home
Creating a cookie butter icebox cake at home is a delightful experience that pairs the joy of cooking with the satisfaction of an impressive dessert. Not only is this cake incredibly simple to assemble, but it also requires no baking, making it perfect for young professionals with busy schedules.
Imagine presenting a dessert that’s both delicious and visually appealing at your next gathering. Plus, the combination of cookie butter, cream cheese, and whipped cream creates a creamy texture that’s indulgent yet light. It’s a dessert that can be easily customized with your favorite toppings.
So why not treat yourself to this gourmet experience? Dive into the world of no-bake desserts with this easy recipe—your taste buds will thank you! For more baking inspiration, check out King Arthur Baking for tips on mastering other sweet creations.
PrintCookie Butter Icebox Cake: The Indulgent No-Bake Delight
A rich and creamy dessert that is perfect for any occasion.
- Prep Time: 15 minutes
- Cook Time: 0 minutes
- Total Time: 4 hours 15 minutes
- Yield: 8 servings 1x
- Category: Dessert
- Method: No-Bake
- Cuisine: American
- Diet: Vegetarian
Ingredients
- 1 cup cookie butter
- 2 cups whipped cream
- 1 package graham crackers
- 1/2 cup powdered sugar
- 1 teaspoon vanilla extract
Instructions
- In a bowl, mix the cookie butter, whipped cream, powdered sugar, and vanilla extract until smooth.
- In a baking dish, layer graham crackers at the bottom.
- Spread a layer of the cookie butter mixture over the crackers.
- Repeat layers until all ingredients are used, finishing with the cookie butter mixture.
- Refrigerate for at least 4 hours or overnight.
- Serve chilled, garnish as desired.
Notes
- For extra flavor, consider adding chocolate chips or nuts.
Nutrition
- Serving Size: 1 slice
- Calories: 320
- Sugar: 22g
- Sodium: 150mg
- Fat: 22g
- Saturated Fat: 10g
- Unsaturated Fat: 10g
- Trans Fat: 0g
- Carbohydrates: 28g
- Fiber: 1g
- Protein: 3g
- Cholesterol: 30mg
Keywords: Cookie Butter, Dessert, No-Bake, Cake